Invoicing may seem intimidating, particularly if you’re new to the process. However, it’s an integral part of managing your business finances effectively. In this article, we will guide you through the rudiments of how to invoice a project, making it less daunting and more efficient. Keep reading to make your invoicing process seamless.
Understanding the Basics of Project Invoicing
Invoicing is more than just requesting payment from a client; it’s a legal document that serves as a record of goods or services rendered. This process begins when a project contract is signed and ends when payment is received.
To fully understand how to invoice a project, it’s pertinent to immerse yourself in the language of invoicing. Terms like invoice date, terms of payment, itemized services, and so forth are quite common. The more familiar you become with these terms, the easier your life will be when it comes to invoicing.
It’s also essential to comprehend the laws governing invoicing in your country. This is because invoicing laws may vary from one jurisdiction to another. These laws often cover tax handling and penalties for late payment, among others.
Essential Elements To Include in Your Project Invoice
A well-structured invoice should be transparent, comprehensive, and professional. It should detail what services have been provided, when they were delivered, the costs associated with these services, when payment is expected, and the preferred payment methods.
The first thing your invoice should have is your company logo, name, and contact information. These details foster authenticity and allow your clients to easily reach you should they have inquiries.
Next, you want to incorporate your client’s contact information. This should include their name, phone number, email address, and physical address. This not only confirms that the invoice is being sent to the correct recipient but also facilitates smooth communication.
Step-by-Step Guide To Creating a Professional Invoice
The first step is to set a clear invoice title. This could simply be the word ‘Invoice’ or a phrase that aligns with your business brand.
Next, detail your business information at the top of the invoice. This should include your business name, address, email, and contact number. Following this, provide the billing information of your client exactly as it is in your agreement.
Once you’ve provided the relevant contact details, itemize the services you provided alongside their cost. Be as detailed as possible to avoid any misunderstandings or disputes. After listing the services, calculate and display the total amount due.
The last step involves clarifying the payment terms, due date, and any late fees or discounts provided. This offers your clients concrete expectations about when and how to make payments.
Leveraging Invoice Software To Simplify Your Invoicing Process
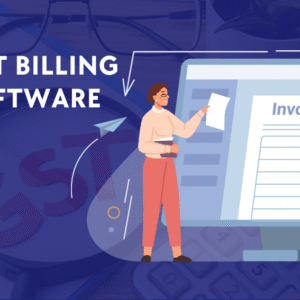
Manually creating invoices can be time-consuming and prone to human error. The advent of invoicing software has made the invoicing process faster, more accurate, and easier to track. These applications often offer customizable invoice templates, automate recurring invoices, and offer multi-currency invoicing, among other features.
Using invoicing software often means quicker payments. This is because the software comes equipped with features that allow automatic billing, payment reminders, and online payments, thus making it easier to get paid.
Perhaps one of the most significant benefits of invoice software is the ability to keep track of your finances. The software records each invoice issued, making it easy to monitor the outstanding invoices and the ones paid.
In summary, utilizing invoicing software not only simplifies your invoicing process but aids in maintaining a professional image with your clients.


